
Sponsored:

Every click leaves a trail. PureVPN shields your data from hackers, hides your location, and keeps your browsing private—especially on public Wi‑Fi.
In a world where your information is constantly exposed, a VPN puts control back in your hands.
Protect your privacy today—get PureVPN now.
Ampler Bikes via YouTube
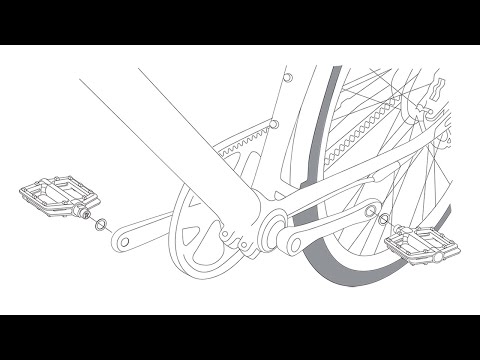
During the setup of your Axel or Juna Model, make sure that the washer sits flush in the crank arm grove, before installing your pedal. For further notes, please read the manual inside the box of your Ampler delivery!
Achte beim Aufbau deines Axel- oder Juna-Modells darauf, dass die Unterlegscheibe bündig in der Aussparung des Kurbelarms sitzt, bevor du dein Pedal montierst. Weitere Hinweise findest du in der Anleitung, die deiner Ampler-Lieferung beiliegt!
Useful links:
Operating instructions: qr.page/g/3KomQjsofUU
Assembly instructions, also for Generation 2 models (see note in this video for Axel & Juna): https://support.amplerbikes.com/en/support/solutions/articles/43000617659
Authorisation of your Ampler bike: https://support.amplerbikes.com/en/support/solutions/articles/43000656544
Support Portal: https://support.amplerbikes.com/
Nützliche Links:
Bedienungsanleitungen: qr.page/g/3KomQjsofUU
Aufbauanleitung, auch für Generation 2 Modelle (siehe Hinweis in diesem Video für Axel & Juna): https://support.amplerbikes.com/de/support/solutions/articles/43000617659
Autorisierung deines Ampler Bikes: https://support.amplerbikes.com/de/support/solutions/articles/43000656544
Support Portal: https://support.amplerbikes.com/